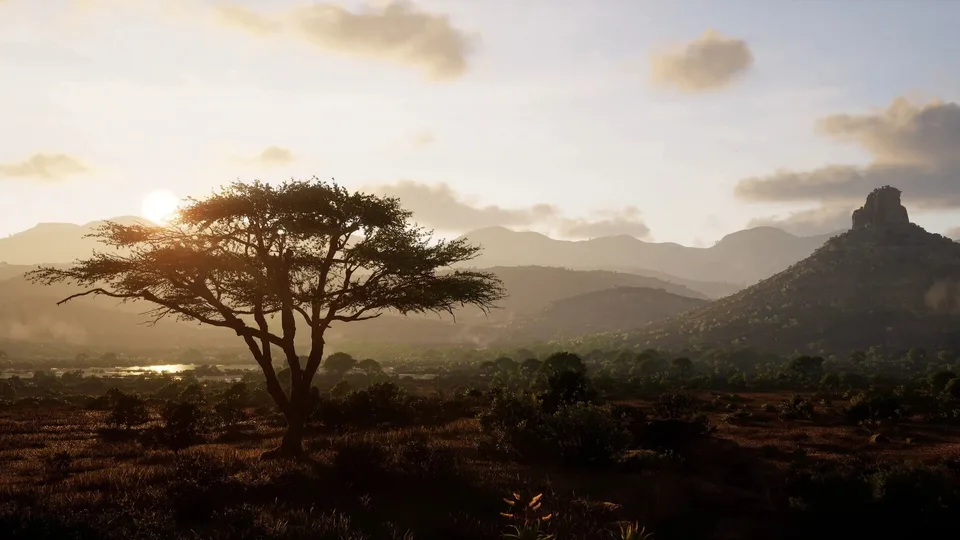
Mastering the Way of the Hunter 2 Photo Mode: Pro Tips & Guide
Discover how to master the Way of the Hunter 2 photo mode. From increasing camera range to capturing stunning wildlife, get the best tips for your adventures.
Published: Way of the Hunter 2 Wiki Editorial Team
Table of Contents
Capturing the perfect wildlife moment is an art form in the wilderness, and understanding the Way of the Hunter 2 photo mode is essential for any serious virtual outdoorsman. Whether you are documenting a legendary five-star trophy or simply admiring the breathtaking landscapes, this tool allows you to preserve your best memories from the field.
Why does mastering this feature matter? Beyond the obvious aesthetic appeal, learning to use the camera effectively allows you to study animal behavior and genetics without physically disturbing the herd. This guide will walk you through everything you need to know to get the most out of your camera in the game.
Understanding the Basics of Photo Mode
The photo mode is not just a screenshot utility; it is a vital research tool. By positioning yourself correctly and utilizing the camera, you can inspect the finer details of an animal’s trophy growth, age, and fitness from a distance. As you dive into Way of the Hunter 2, you will find that the camera is your best friend for long-range observation.
Key Camera Functions and Controls
Feature
Action/Control
Why use it?
Clear UI
Press 'C' (default)
Removes HUD for clean, cinematic shots
Increase Zoom
Mouse Scroll/Camera Tool
Inspect details on distant animals
Range Check
Movement keys
Position yourself for the best angle
Screenshot
F12 (Steam)
Save your high-resolution memories
According to community reports, many players struggle with the default camera range. It is important to note that the camera range is not infinite—it typically hovers around 50 meters, making stealthy movement toward the herd a critical component of your success.
How to Increase Your Photo Mode Range
One of the most frequently asked questions by players is whether they can extend the camera reach. The answer is yes, through specific gameplay progression. Community experience suggests that your ability to capture distant shots is directly linked to your character's perks and the chosen game difficulty.
[!TIP]
Boosting Your Reach
To extend your camera range by up to 50%, focus on finding all the photo spots on the Transylvania map. This specific perk is a game-changer for players looking to document herds from a safer, non-spooking distance.
Factors Influencing Camera Range
Factor
Effect on Range
Recommendation
Difficulty Setting
Hiker (Longer) vs. Ranger (Shorter)
Play on Hiker if your primary goal is photography
Transylvania Perk
Increases range by 50%
Complete all photo spot collectibles
Elevation
Provides better lines of sight
Use hunting stands or elevated ground
When using the camera, imagine the potential reach as a box. Flying your camera directly forward yields the maximum distance. If you encounter the "invisible wall" of the camera range, try adjusting your angle or moving sideways to see if it allows for a slightly deeper perspective.
Best Practices for Wildlife Photography
If you want your portfolio to look professional, you must consider both the technical settings and the environmental factors. Way of the Hunter 2 features a highly realistic dynamic weather system, which creates unique opportunities for stunning visuals.
Pro-Tips for Better Composition
Patience is Key: Similar to real-world hunting, the best shots happen when you wait for the animal to turn or move into a patch of clear light.
Utilize the Weather: Snow or rain adds depth to your images. Players have noted that snow on the back of an animal creates an incredible, authentic visual that is perfect for artistic screenshots.
Study the Herd: Don't just snap one photo. Use the camera to identify which animals are worth keeping for the gene pool and which should be harvested.
The Dog Factor: Don’t forget to include your canine companion in your photos! Their presence in the wilderness adds a narrative element to your shots.
Managing Your Captured Screenshots
One point of frustration for many newcomers is locating where the game saves these photos. Unlike the built-in Steam screenshot manager, the in-game camera saves images to a specific folder on your local drive.
Finding Your Screenshots (PC)
Steam Screenshots: Press F12 in-game. These are managed via Steam Settings > In-game > Screenshot folder.
In-game Camera: These files are often hidden deeper in the game’s save directory: .../Saved/Screenshots.
Shortcut Tip: Create a desktop shortcut to your WayOfTheHunter/Saved/Screenshots folder to avoid deep-diving into your C drive every time you want to review your work.
Even seasoned players can make mistakes that ruin a potential masterpiece. Avoid these common pitfalls to improve your success rate in Way of the Hunter 2.
Troubleshooting Your Photography
The Spook Radius: Trying to get too close for a "perfect" shot often causes the herd to scatter. Use your binoculars first to spot the herd, then plan your photo approach to stay outside the spook radius.
Ignoring the HUD: Forgetting to clear the user interface (pressing 'C') is the most common reason for otherwise perfect shots looking cluttered.
Skipping the Perk: Attempting to photograph long-range animals on 'Ranger' difficulty without the Transylvania perk is an uphill battle. Secure the perk early if photography is your focus.
FAQ: Way of the Hunter 2 Photo Mode
Q: Can I use photo mode in multiplayer?
A: According to community reports, certain content like specific collection perks or progression quests might be limited to single-player story mode. Always check your current session settings.
Q: Is there an in-game gallery for my photos?
A: No, currently the game does not feature an in-game gallery. You will need to access the save folder on your PC or use the Steam Screenshot Manager to view and organize your pictures.
Q: Does difficulty affect my photo quality?
A: It does not affect the resolution or quality of the image itself, but it significantly impacts your ability to get close enough to the animals, which indirectly dictates the quality of your composition.
Q: How do I share my photos with the community?
A: The best way is to take a Steam screenshot (F12) after clearing the HUD. You can then upload these to your Steam Cloud content or the game's discussion section to share your best shots with other hunters.
Mastering the Way of the Hunter 2 photo mode takes practice, but the rewards—a digital lodge filled with your finest hunting memories—are well worth the effort. Get out there, respect the herd, and happy shooting!